Landscape photography tips
We asked Nikwax employee and photographer James Robertshaw to put together some landscape photography tips to get the most of your pictures whilst out and about.
It’s not about the camera!
I’m sure I’m not the only person to have been complemented on a photo with the phrase “you must have a really nice camera”. In reality, beautiful landscape photography has so much more to do with the person taking the picture than the camera. A great landscape photo can be taken with anything from a pinhole camera made from an old tin to an iphone and everything in between.
Many of us either have a compact camera or a camera-phone that will do the job very well and won’t break your back or take up precious space whilst walking or climbing. Clearly a pro DSLR will give you more performance than a small compact, but is probably overkill for most people. A tip if you’re choosing a new camera is don’t be fooled by megapixel marketing. A greater number of megapixels does not necessarily make a better camera. Other factors like the physical size of the sensor in the camera and the quality of the lens have a much greater impact on image quality.
The whole world is your Tripod
Stating the obvious, a tripod will help you take photos on a long exposure setting which would be impossible hand held. In low light or at night, long exposures can produce some great effects such as blurring clouds and water or even streaking stars if you’ve got the patience! The problem with carrying a tripod on the hill is the weight and bulk, so if you’re travelling light you can still improvise by supporting your camera on a soft piece of clothing to keep it nice and still. A tip when using an improvised tripod is to use the self-timer function on the camera. You can then compose your shot and press the shutter button before settling the camera in position so you don’t have to disturb it once set.
It is about the light
The light at either end of the day when the sun is low in the sky can produce lovely long shadows and a softer, more ambient light than in the middle of the day. It sounds very simple but just being aware of the position of the sun can make a significant difference to your photos.
Shooting towards the sun (even on a cloudy day) and focusing on a dark part of the scene can ‘blow’ parts of the image causing them to look white and lack any detail. Even with the camera set to automatic, you can ‘cheat’ the exposure by half pressing the shutter button while focusing on a bright part of the scene then keeping the button half pressed, recompose the scene and take the picture. The camera will ‘think’ the scene is brighter and you’ll get less of the photo blown out with white light.
Most digital cameras have a nifty feature which allows you to quickly check whether your photo is under or over exposed. This is called a histogram and displays how much of the image is dark and how much is light. If the lines of the histogram are mostly bunched up to the right it means some areas of the shot are very bright and it might be overexposed. Alternatively, if they’re bunched up to the left it means more dark areas and possible underexposure. There’s no right and wrong, but if you can find the setting to display the histogram it can be a great help to quickly check the exposure of your shot.
Composition counts
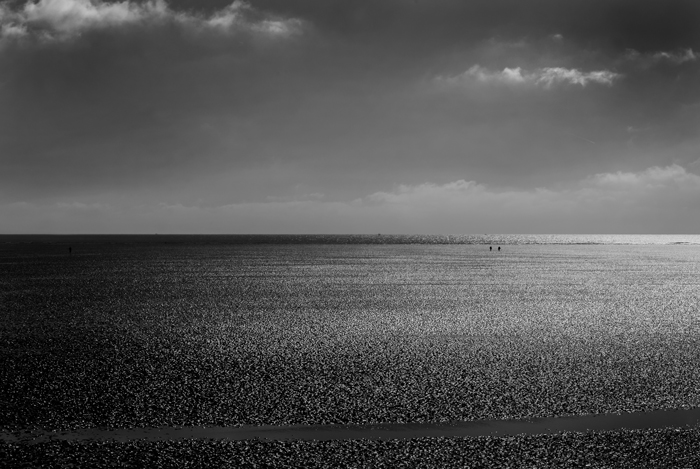
The ‘rule of thirds’ of composition suggests that you imagine the scene divided into thirds both horizontally and vertically – creating a grid. Many cameras have a function to display this grid as you look through the viewfinder. The idea is to then position the subject of the photo at the intersection of two of the lines. This always places the subject off centre. The rule of thirds would also suggest that you position the horizon on one of the horizontal lines and not through the middle of the image. A simple example of this would be to avoid placing the horizon through the middle of a minimal seascape. ‘Lead-in’ lines can also help produce a pleasing composition. These are lines in the scene, be this power lines, a river or even clouds, which take the eye into the image, creating perspective and adding interest.
Using the grid and thinking about the rule of thirds and lead-in lines can be very helpful but some of greatest landscape photographs break all the rules. If we all took photos carefully following the same guidelines then chances are if we’ve been to the same place, our compositions will be very similar. Making an effort to get an interesting angle by getting higher or lower can make all the difference. Understanding the basics of composition is a great way to improve your photos. Learn the ‘rules’ in order to break them!
Manual settings
Getting familiar with the basics of manual settings might seem a little daunting but is well worth a little effort and practice.
Aperture refers to the size of the opening which lets light in to the camera and is measured in ‘F stops’. It also controls ‘depth of field’ which is how much of the scene is in focus. For example, F1.4 is a very wide aperture, so a lot of light comes into the camera and only a very small amount the picture will be in focus with the rest blurred. Typically, this setting would suit shots like close ups of flowers. On the other hand, an aperture setting of F22 would let very little light into the camera and the whole scene can be in focus with no blurring. Just to complicate things, your distance from the subject also has an impact so the closer you are to your subject the shorter your depth of field will be.
Shutter speed is a little more straightforward, simply describing the speed with which the shutter opens and closes exposing the camera’s sensor or film to the light. Keeping the shutter open for longer means more light gets in to the camera which is good for night or low light shots. A faster shutter speed would be needed to capture movement like birds in flight. Shutter speeds are displayed as fractions of a second so 1/5 is a fifth of a second (quite slow) and 1/800 is an eight hundredth of a second (pretty fast).
ISO refers to how sensitive the camera’s sensor is to light. An ISO of 200 is low sensitivity and ISO 3200 is high sensitivity. Generally speaking, the lower the ISO, the clearer and sharper the photo will be. High ISO settings can lead to grain or ‘noise’ in the image which might not be what you want although it can add character to the shot, especially in black and white.
Aperture, shutter speed and ISO all affect each other so setting them is about balance and taking account of how much light is available and what effect you want to achieve with your shot. The smaller the aperture (little light coming in, high F number) the slower the shutter speed will need to be, to compensate by allowing more light in. The wider the aperture (smaller F number) the faster the shutter speed will need to be, to compensate by restricting the amount of light coming in to the camera.
Digital cameras record all this information so you can look back over your shots and see what your settings were to help your understanding – you can even practice by taking lots of shots of the same thing but with different settings. Good luck and happy shooting!
James Robertshaw is a freelance photographer who also works for Nikwax.
Leave a Reply